AWS: Learning how to deploy a simple ECS Fargate service
January 26, 2025

Introduction
I've never deployed a Service to AWS ECS Fargate before, but today I decided to give it a try. From what I've read, Fargate allows you to run Docker containers in a serverless manner (i.e., without needing to manage EC2 instances). This is similar to AWS Lambda, except that Fargate deploys containers and does not have the short-lived lifecycle (up to a 15-minute limit) that AWS Lambda functions have.
All the code below can be found in this GitHub repo.
Step 1: Writing the Service Code
First, I needed a Service to deploy.
I wrote a simple Express server using a Node.js runtime. I tested it locally (by running node index.js in the terminal) and verified that it was able to return "Hello World!" when I visited http://localhost:3000/ in a browser.
Step 2: Building a Docker Image
Next, I needed to package this code into a container image that could be deployed and run on ECS.
I created a Dockerfile in the same directory and built the Docker image locally by running docker build -t deploying-simple-fargate-service . in the terminal.
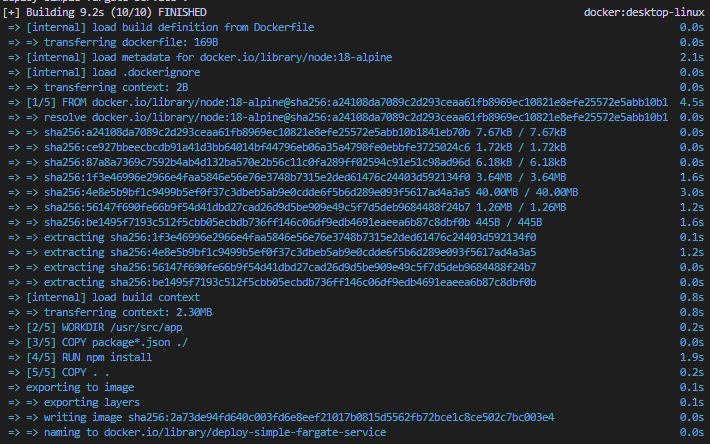
Now, when I run docker images in the terminal, I can see the deploy-simple-fargate-service image.

Finally, I verified running the container image by running docker run -p 3000:3000 deploying-simple-fargate-service in the terminal. I confirmed it worked by visitinghttp://localhost:3000/ in a browser and seeing it return "Hello, World!".
Step 3: Pushing the Image to AWS ECR
With the container image ready, the next step is to upload it to AWS ECR, making it available for ECS to use.
I used the AWS Management Console to create a repository in AWS ECR named deploying-simple-fargate-service.

I ran the commands below to tag and push the image to AWS ECR. (If you're running these commands, be sure to replace the account ID and AWS region with your own.)
aws ecr get-login-password --region us-east-1 | docker login --username AWS --password-stdin 463601726399.dkr.ecr.us-east-1.amazonaws.comdocker tag deploying-simple-fargate-service:latest 463601726399.dkr.ecr.us-east-1.amazonaws.com/deploying-simple-fargate-service:latestdocker push 463601726399.dkr.ecr.us-east-1.amazonaws.com/deploying-simple-fargate-service:latest
I confirmed that the image was successfully pushed.

Step 4: Creating the ECS Fargate Service
Finally, we can create the ECS Fargate Service.
To set up the ECS Fargate service, I started by creating a "Task Definition" called deploying-simple-fargate-service-task. In the Task Definition, I specified the ECR image URI (463601726399.dkr.ecr.us-east-1.amazonaws.com/deploying-simple-fargate-service:latest) and configured the container port to 3000. I left all the other settings as default.
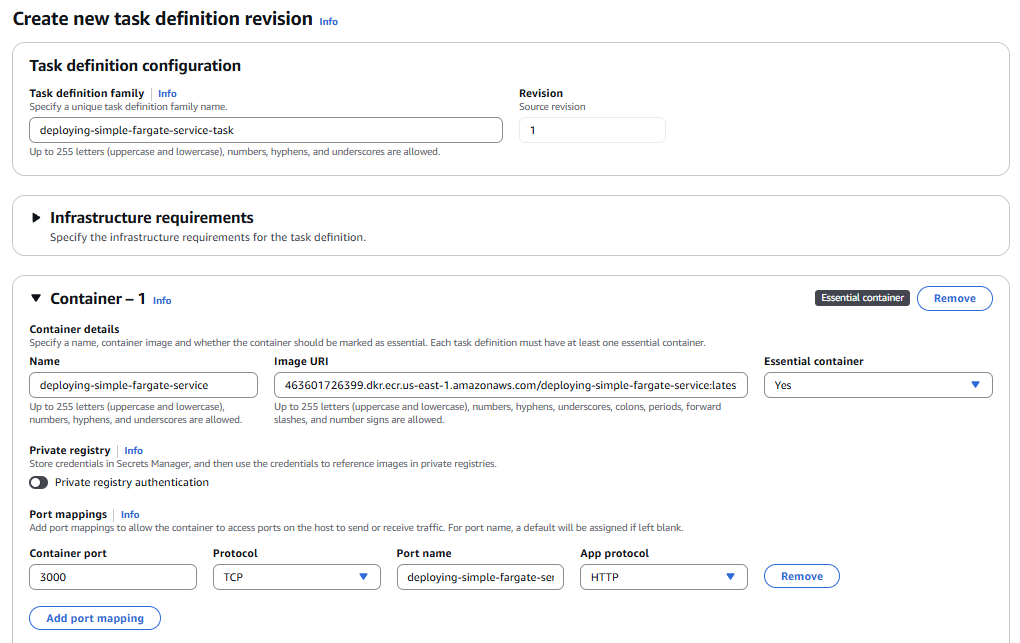
Then, I created a "Cluster" called deploying-simple-fargate-service. I left all settings as default.

Within the Cluster, I created a "Service" called deploying-simple-fargate-service-service. I selected the Task Definition I had created earlier.
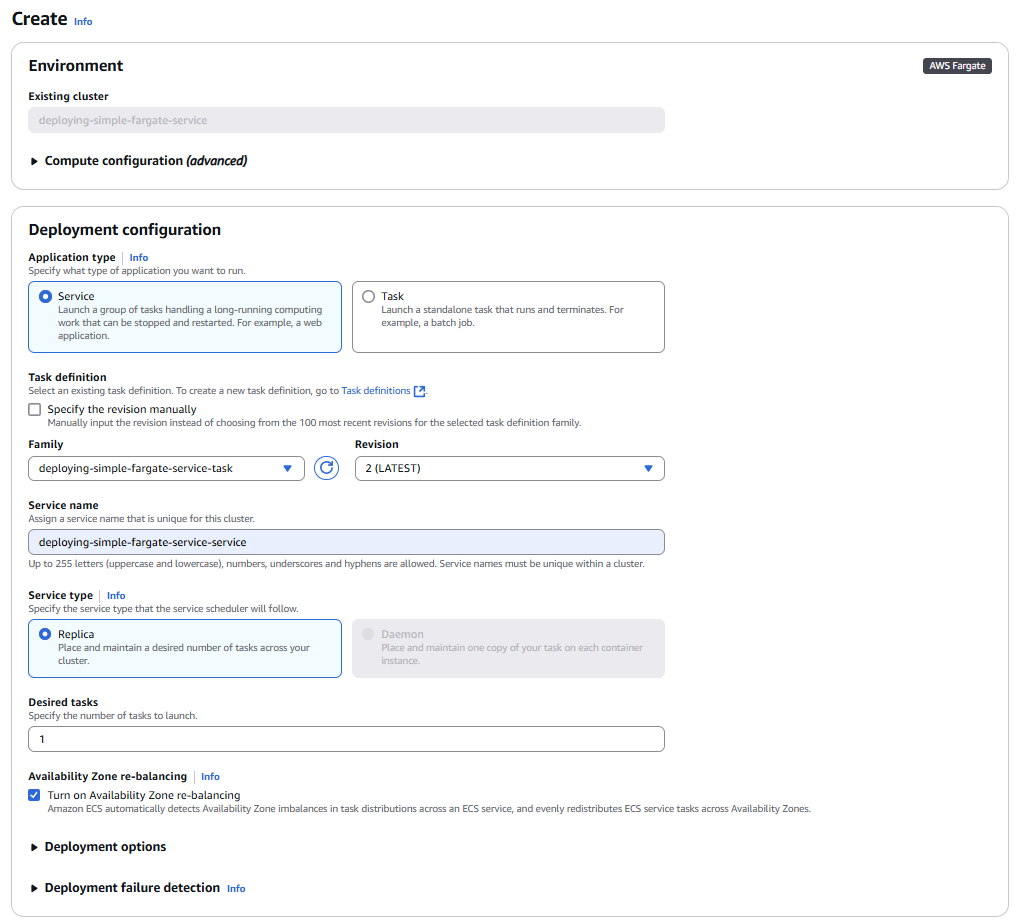
After a few minutes, the Service was created.

Step 5: Calling the Service
The last step is to call the Service. I clicked on the Service and selected the "Tasks" tab.

I clicked on the Task to open it, which displayed a public IP address.
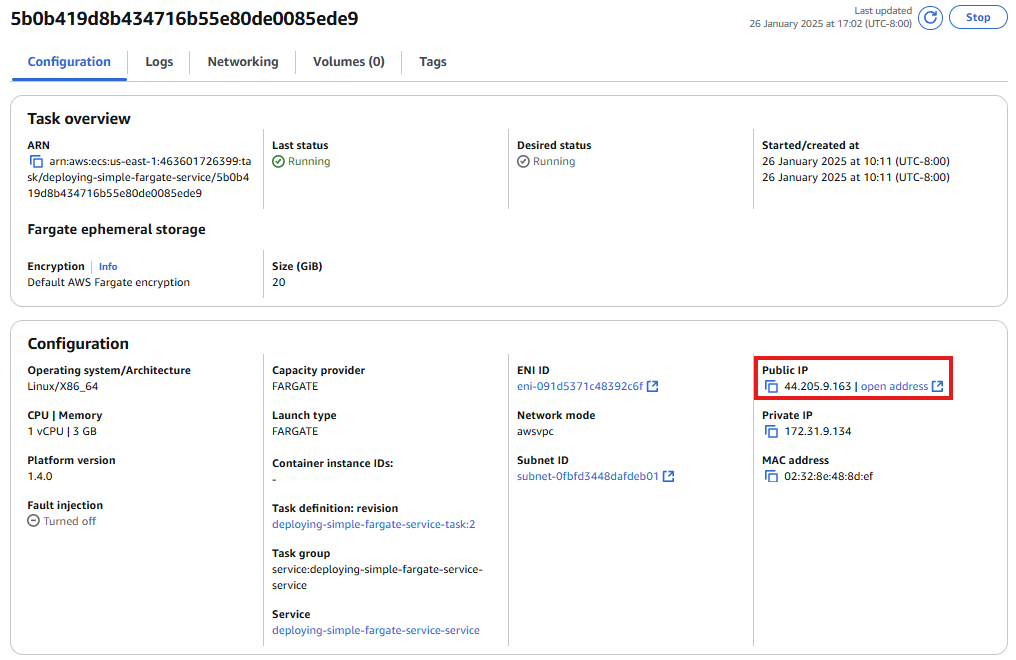
I visited the following address: http://44.205.9.163:3000 on a browser and, sure enough, the "Hello World!" message appeared.
